
Purchasing a backdrop for any kind of event can be steep but without one, I really have no idea where to stage photos. Candid photos are always the best but it’s cute to have somewhere to stand and pose. I didn’t want to pay an arm and a leg for something that wouldn’t be reusable so I threw together a fairly easy project. I created a baby shower blocks backdrop, complete with baby name, all of things I already had here at home!
What You’ll Need:
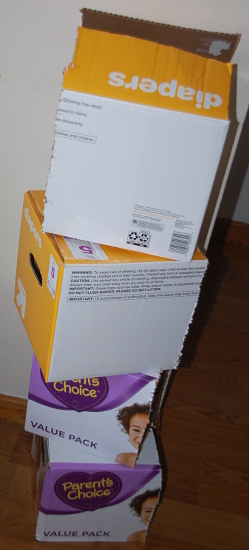
Diaper/wipes boxes
White wrapping paper
Construction paper
Tissue paper
Balloons
Balloon holder (or something heavy you can tie them to)
Glue stick
Tape/glue (optional)
Directions: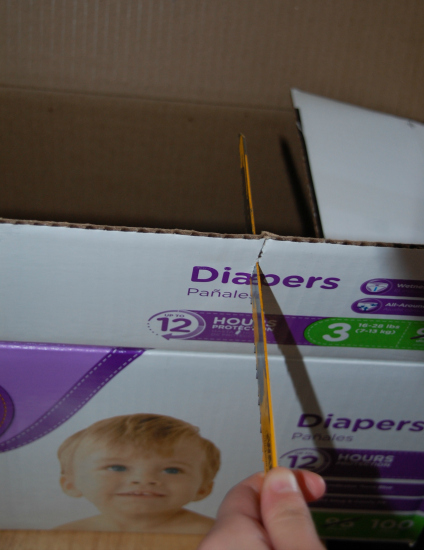
1. Cut the diaper boxes in half. I used a saw but my husband says he thinks a knife would have worked better. I guess that’s for you to decide! You will need as many boxes as there are letters in the baby’s name.
2. Wrap the boxes like presents, completely, even the open side.
3. Cut a square out of each piece of cardboard, as well as the letters of the baby’s name.
4. Use the glue stick to glue the square and letter on each “block”. I wouldn’t use the open side for the face, though.
5. Stack each “block” on top of each other and carefully cut open the top block slightly.
6. Stuff the block with tissue paper and the balloon holder. We tied the balloons to a full water bottle and placed it inside of the tissue paper.
The optional tape or glue stick is because we chose to put our baby shower blocks backdrop outside and it was very windy so it kept toppling over. I used tape to stick each block to each other and to the outside of my house.
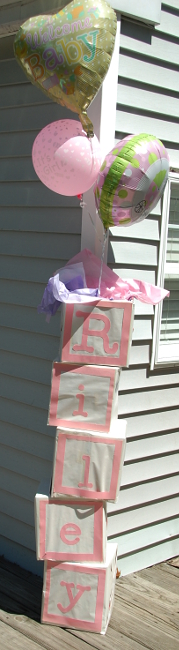
My blocks backdrop came out really adorable, my sister absolutely loved it! I’ll admit that we all forgot to take pictures in front of it (whoops!) but my sister liked it so much that she carefully detached it from the wall and took it home to put in the baby’s room. What a neat and simple decoration!