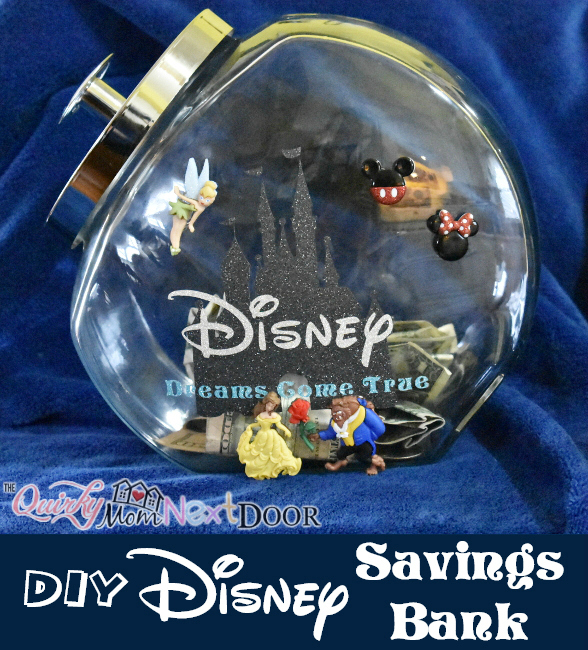
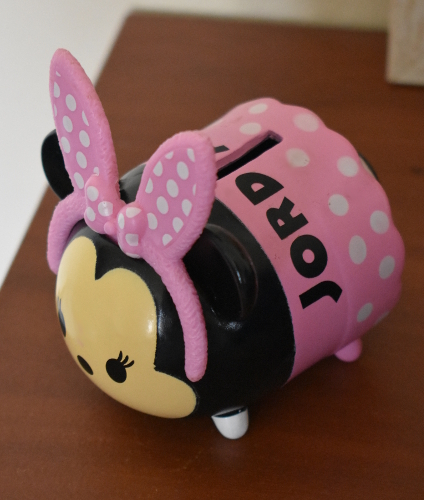
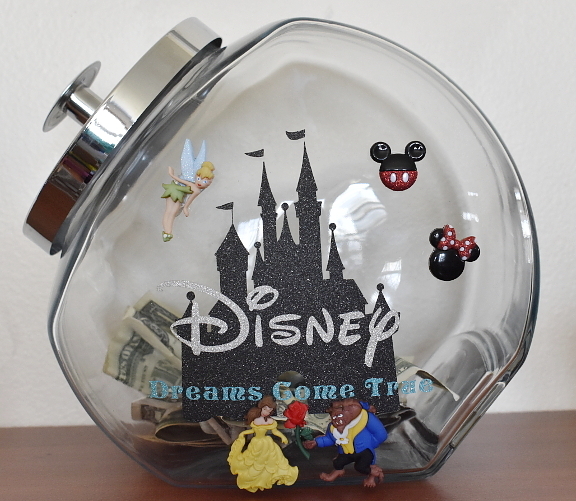
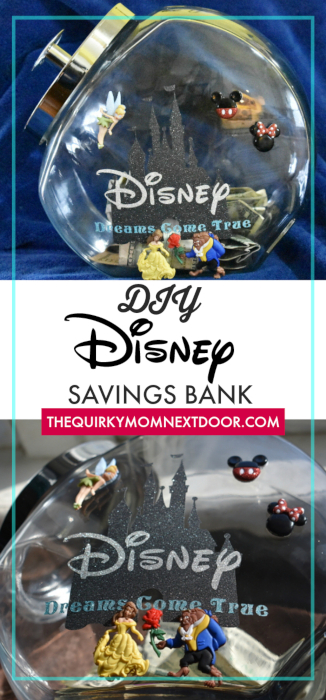
No matter which aspects you manage to save money on, Disney World is an expensive trip. Between trip tickets, food, souvenirs, lodging, and transportation to Florida, you’re putting out a ton of money for this vacation. The Easter Bunny left a few adorable Mickey Tsum Tsum bunny piggy banks that I personalized for the kids to start saving up for their souvenirs but I wanted to do a big jar for the whole family to drop spare change and bills into. I thought I would make something big and pretty, something that we would see and it would instantly remind us that our amazing trip is going to happen!
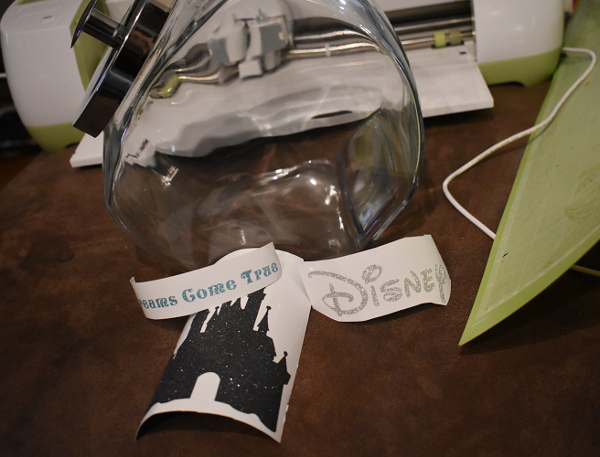
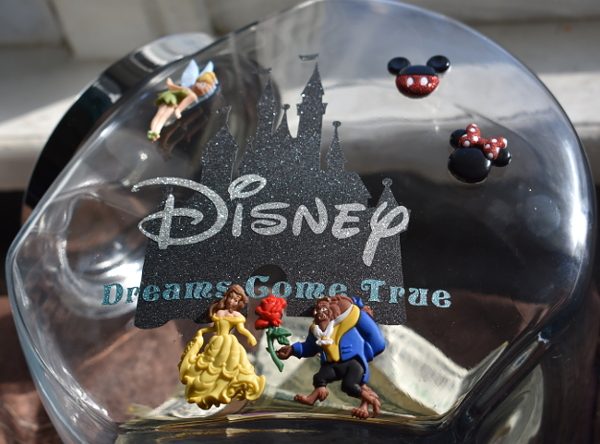
My favorite Disney World image would have to be the Cinderella Castle at Magic Kingdom. I recently dreamed of my kids all sitting in front of it with smiles ear to ear, the sun glistening from behind it. Everything looked glittery and happy. That’s what I think about when I see that magical castle! I woke up in such a good mood! Needless to say, I decided that I wanted that castle to be the image that I use for our family bank. I’ve included the SVG of that one below, if you’d like to do the same!
I saw a lot of banks that included the family’s last name or witty little phrasing, like “Disney Dollars” and “Mickey Money” but I decided to go with what kept playing in my mind… Dreams Come True. I’m of the opinion that you can pretty much find anything online for free so I use free fonts for this project. For the Disney text, I used Waltograph and for the “Dreams Come True”, I used Storybook, which is the Sleeping Beauty font. Both fonts from Da Font, my favorite free font website.
My choice of vinyl is nearly always glitter because, well, I LOVE glitter! The jar is really up to you, you can resize the image to fit any jar, but I bought a $6 cookie jar from Target. I’ve read that these types of jars are sold at the dollar store but local ones didn’t have it!
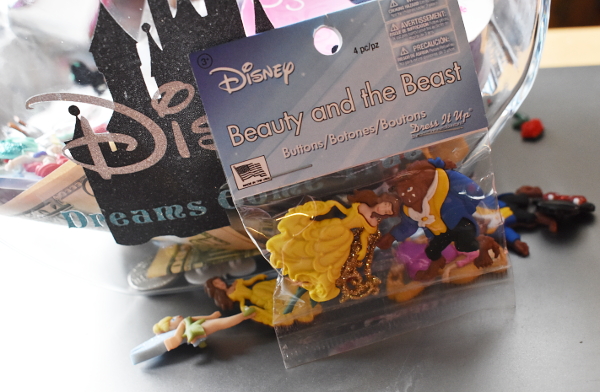
I also used Disney Dress It Up buttons to add some specific characters. I am obsessed with Dress It Up buttons and this definitely won’t be the last project you see where I include them! You can find these buttons just about any craft store (cheaper than Amazon!), the Disney ones are usually about a dollar more than the others but always look online for a store coupon!
What You’ll Need:
Any kind of jar.
Vinyl.
Disney Dress It Up buttons.
Here’s What To Do:
1. Wipe down the jar to the best of your ability. These jars are fingerprint magnets!
2. Download the Disney Castle Silhouette SVG and upload it to your Cricut. If you use a different cutting machine, you may have to convert the file type if SVGs are not supported. I use Cricut Design Space, which currently uses SVGs. I also used the “Contour” feature to remove the other aspects of the castle. Add any text you want, be sure to check out those free fonts I mentioned.
3. Cut, peel, and apply your vinyl. I prefer to use transfer tape to get the vinyl to go on more evenly. You can also use the scraper to help remove bubbles. Luckily, this baby went on smoothly for me with the transfer tape!
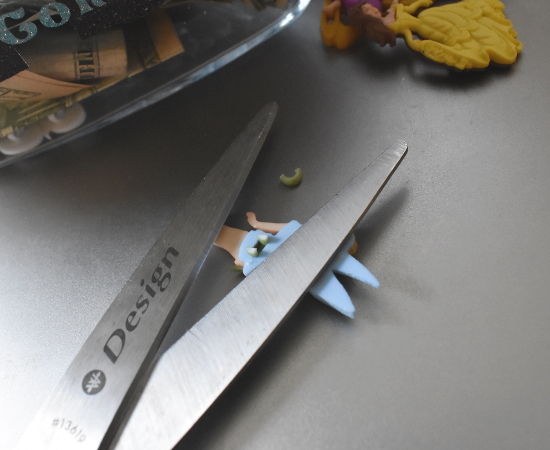
4. Cut the button loop off of the back of your Dress It Up buttons.
5. Use hot glue to secure your Dress It Up buttons to the glass!
Optional: Put a bow around the opening for additional cuteness!
Please feel free to share your finished products with us! What else did you make in preparation for your Disney vacation?
Follow along with our Disney journey at #QuirkyQuestforMickey or here on the blog!
*Amazon links are referral links meaning that at no cost to you, I may earn a commission if you place an order. I thank you for your support!
That’s really adorable! I love this idea…especially for getting kids excited about saving for Disney!
I love this!! This is such a cute idea, thank you for sharing!