
One of my favorite things to do with my little ones is document their milestones and growth, often by taking a bazillion pictures. At some point in the last several years, month stickers became a thing. I was so excited to buy ones for my son that looked like little ties:
 (Month tie stickers purchased from PurplePossom in 2013)
Between then and now, I got a Cricut. When I was in the store recently purchasing some things to do another Cricut project, I saw sticker paper and had an aha moment. I would create my own month stickers so that I could make them more customized! Use them for how old they are, their first holidays, or a specific milestone like “Smiled for the first time” or “First tooth!”. For this project, I used my Cricut to cut out the stickers in perfect circles but you could do it by hand too. If I recall correctly, those tie stickers that I bought weren’t cut so I had cut each one myself anyway!
What You’ll Need:
– Sticker paper (I used Cricut sticker paper which is relatively thick so if you’re looking for more stickery, glossy stickers, I recommend checking out other types of sticker paper!)
– Access to PicMonkey
– Printer
– Cricut Explore or scissors
Directions:
1. Go to PicMonkey and click “Design”. Choose “Canvas Color” and click the little check box next to “Transparent canvas”. Then go to “Resize” and change the size to 1500 x 2100. This will make it a good size for a 5×7 print.
2. Use the “Overlays” section to create your actual sticker shape. I used the plain circles under “Geometric” but you could use hearts, create your own little ties, whatever you like!
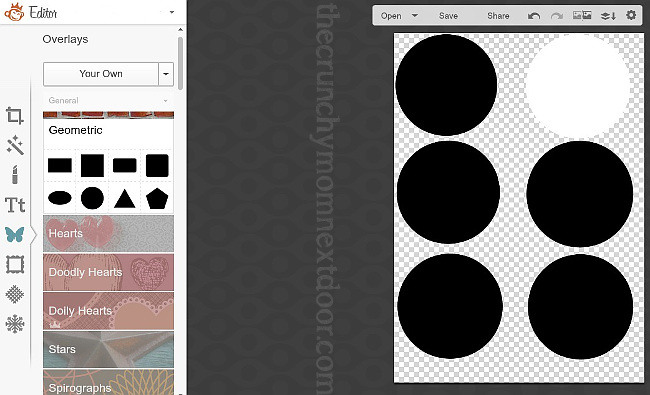
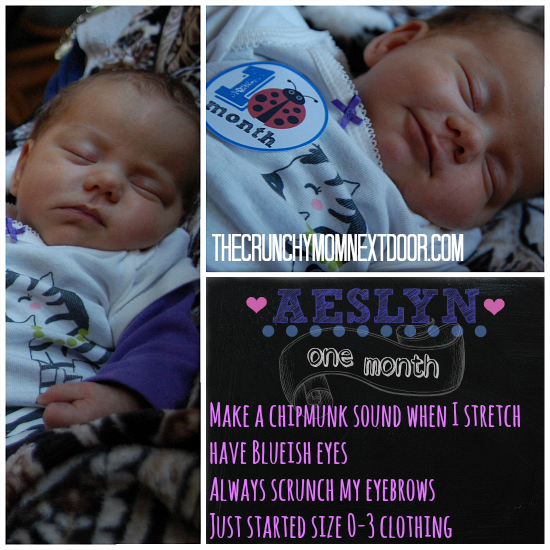
3. Add text, symbols, other overlays, anything to personalize your month stickers. For our baby, I went with a few designs that represented a holiday or season that month, like hearts for her two month because it will be Valentine’s Day.
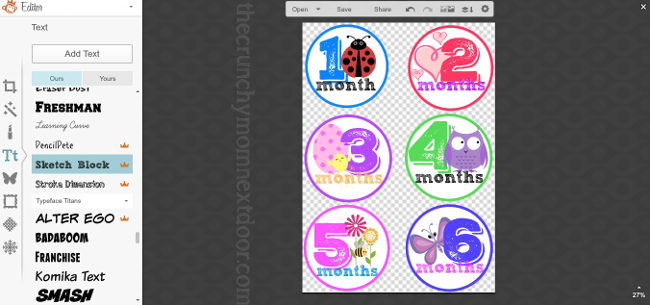
4. If you’re cutting these by hand, print as your settings allow.* Cut and done!
If not cutting by hand, save as .png file and move on.
‘Print Then Cut’ Directions with Cricut Explore:
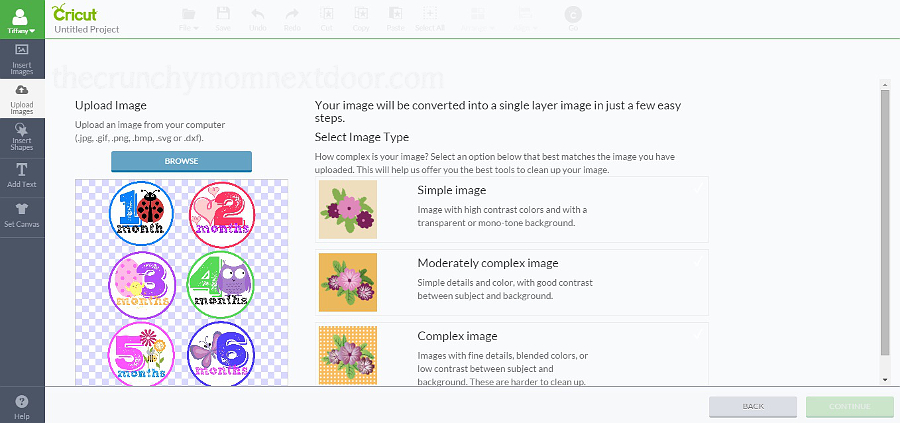
1. Open Cricut Design Space and upload your image. I chose “Simple Image” as the image has a transparent background with no special cleaning up needing to be done with the Cricut.
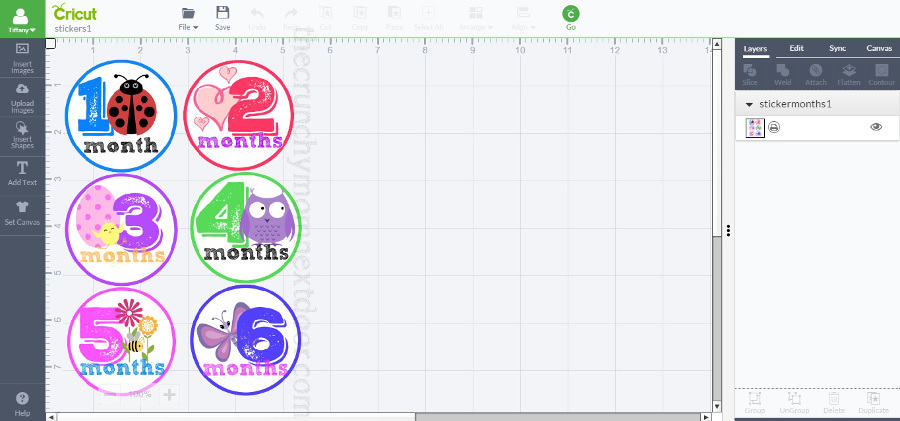
2. Save as a ‘Print Then Cut’ image.
3. Move the image to the top left corner. Drag the bottom right corner of the image and look at the width and height as you do. Get it as close to a 5×7 as you can. My first one said 5 by 7.01 and my second was bigger because I wanted to go as big as it let me. Since the Cricut needs space for the scanner lines, it only goes so big and it will tell you if you’ve made your image too large. Then, click “Go”.
4. Cricut Design Space will direct you to print the image first.*
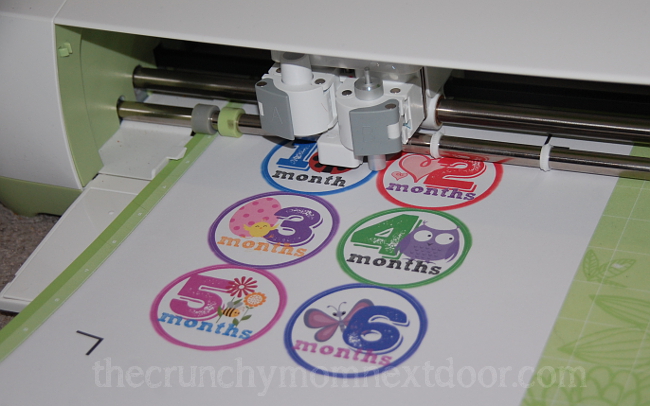
5. Set the Cricut dial to the proper setting. For the Cricut sticker paper, choose “Custom” on the dial and a drop-down will appear on the screen. Drop down to “Sticker Paper, Printable – 0.2mm (Cricut)” on your screen menu.
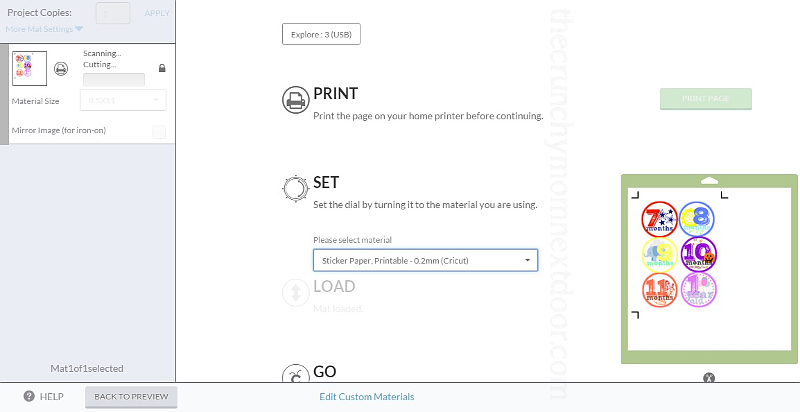
6. Line your printed sticker paper onto the top left corner of your mat and then load it into the Cricut.
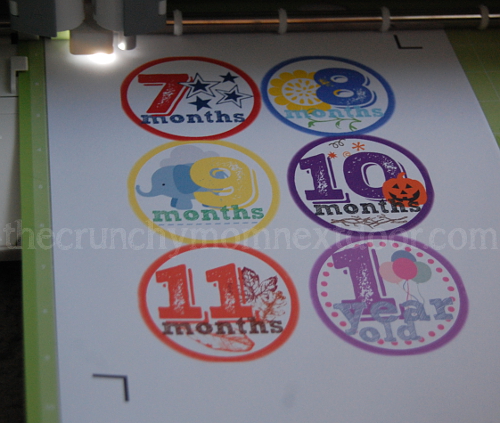
7. Watch your Cricut as it cuts out all of your shapes!
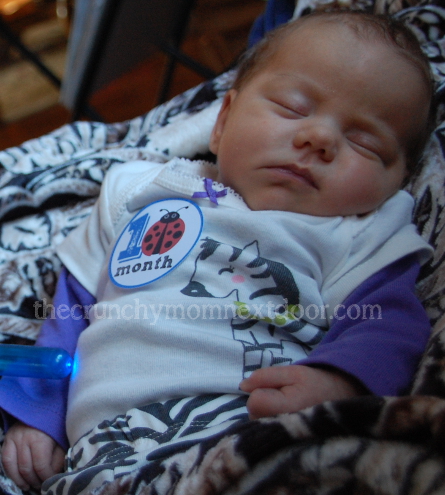
All finished, slap that sticker on a baby and call it a day!
*Be sure to check the settings on your printer and printer preferences on your computer. Some printers have manual load options and/or settings for sticker paper. The thick Cricut paper kept jamming in my printer so I changed the settings on both my printer and computer, then still had to nudge the paper in every time to get it to load properly, since my printer doesn’t have an actual manual load setting.
Oh my gosh! I can not wait to try this! I’m thinking themed with what holiday is that month! So excited!
I don’t have a cricket, but I do love this idea, This would also be wonderful for someone like me with 8 and soon 9 grandchildren to give smiles or hugs and lots of fun! ideas..
@tisonlyme143
Oh my gosh this is such a neat idea! I hate that everyone has the same stickers as my daughter, I can totally change that now!
#hipstermommy LoL jk
I love these, but am I missing something about the holiday themed? I wanted to do that at first, but doesn’t it all depend on how old the baby is? The “2” doesn’t really represent the month of the year “February” but really represents the babies age, right? So you may use the “2” sticker in July once the baby turns two months but the hearts wouldn’t really go with July…right?
That’s what great about making them yourself, you can personalize them! 🙂 My baby was born in December and I wanted to do correlating holiday pictures on her stickers. When she was 2 months, it was Valentine’s Day. You don’t have to do holidays at all though! PicMonkey has lots of cute little characters and clipart to use for free!
This is really cool. I have a new grand daughter we could do this with.
This is really cute. I’ve made stickers with my kids names on it before, they always like that.