Hi, Crunchy Mom readers! I’m Erica, the blogger behind Secondary Soul. This is my first guest post so I really hope you like it. Tiffany and I met years ago on a forum for moms. She was pregnant with her first baby and I had just become a mother myself. We bonded over dark humor and poop. That’s how true friendships begin, right? We’ve been the best of friends since, even giving birth to our second children mere weeks apart. I’m not sure I’ll ever forgive her for popping first but we all have our thorns to pull, you know? A few years ago, we sort of fell onto the “crunchy” train together and it’s become something we’re both hugely passionate about. We’ve also bonded over our love of crafting, which brings me to why I’m here…
Today I’m going to show you how to make a festive little holiday headband and re-usable gift tags made from scraps of junk we all have lying around the house. I’m also going to give some suggestions on how you can go paperless on Christmas morning. Because Christmas morning totally needs to be more difficult, right? Enjoy crafting!
Headbands
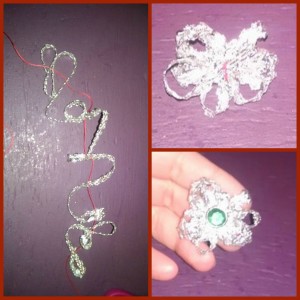
I wanted a festive, quirky hair accessory my daughter (okay, and me…) could wear for Christmas dinner. I opted for a gift bow-esque version but you can do anything under the sun. Snowflakes, snowmen, stars, green feathers if you’re feeling Grinch-y- it all works. A good place to source your materials is your Christmas tree. For this, I used foiled ric rac stitched together.
You’ll need:
Ribbon (I got mine from the packaging of a robe)
Headband
Scissors
Glue- hot glue makes this quicker but any fabric glue will do
Needle and thread
Whatever you’re using for your decoration
First, you’ll need to cut your “end caps” or two 2-inch ribbon pieces. Heat seal the ends by quickly and carefully running a lighter on the edges.
Place a strip of glue down the length of your end cap. Fold over the bottom of your headband, where it will set behind your ears. You may need to trim your ribbon down to fit your headband or double up if your ribbon is too narrow. Repeat on both sides.
At an angle, glue your long ribbon to the end cap.
Tightly wind your ribbon around the headband.
Once you’re to the end of your second end cap, glue your ribbon.
If you’re using the same flourish as me, stitch every 6th or so “hump” on your ric rac until you reach the end.
Pull together, spread it how you want it, and knot your thread.
Add any embellishments. I used a green rhinestone stud.
Glue your decoration onto your headband.
Done!
Gift Tags
These are a fun, easy project to do with kids and they amp up any gift you put them on. Since these are so thick, they’re easily reusable. It might be a pain to fish them out post-gift opening-frenzy but they’re definitely worth it. You can use ANYTHING to produce these- foil, glitter, twine, beads, studs- it’s endless. I personally used leftover cardstock from another project, ribbon, and old nail polish. I do suggest making or finding a template so you can easily mass-produce.
Going Paperless on a Paper Filled Holiday
I am hugely passionate about recycling. While some gift wrap is recyclable, much is not. I hate sifting through bits of paper to find the recyclables while cleaning up after the Christmas Tornado (a.k.a. my children) so I opted to go as paperless as possible. Even going paperless for just a portion of your gifts really makes a difference. Plus, many of these options are already nestled away in your home somewhere.
- Newspaper, old maps, brown paper bags, and magazines. These are great stand-ins for traditional wrapping paper. It can be just as pretty with some embellishment. Get creative!
- Baskets and buckets. The recipient gets a gift AND storage!
- Reusable boxes or boxes that have been flipped inside out (just tear it down and glue it together inside out.) Another option is a wooden box- again, extra storage!
- Plastic tablecloths. Just make sure they’re recyclable.
- Fabric. This is an especially great option when your recipient is a crafter. Or you can use towels.
- Fabric shopping bags. Regular gift bags can also be reused, as they (sometimes) don’t get destroyed during opening.
- Glass jars with the gift hidden in shredded paper or cardboard.
- Toilet paper rolls. Just tuck the ends in.
- Thick foil. It is a pain to work with and shouldn’t be used on gifts for small children, but it is beautiful!
I truly hope you enjoyed this guest post! I’m already looking forward to being invited back (maybe? Lookit, Tiffany, I didn’t use any bad words!) Happy Holidays, Crunchy Mom readers!


2 thoughts on “DIY Holiday Headbands and Gift Tags”