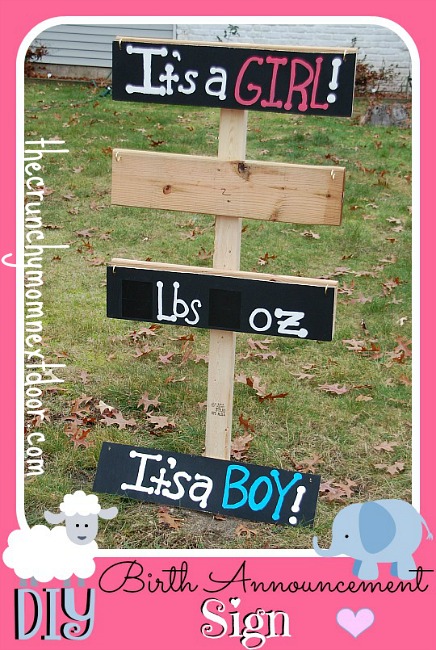
Our newest little one will be here any day now. Being our last baby, our first home, and keeping the gender a surprise, I had a fun idea for creating a birth announcement sign. I’ve seen these adorable “It’s a Girl” and “It’s a Boy” storks outside of people’s homes but they cost around $50 just to rent, from what I’ve seen. I decided that I wanted to make my own personalized sign. It went onto my craft goals list but I honestly never figured that I would get around to it, but my husband saved the day! He went to the hardware store and bought all of the wood supplies and cut them out for me. I love how it turned out, although I can’t show you the finished picture with the names until after Baby comes because that’s a secret!
My husband and I do our “crafting” similarly, in that we don’t really like to measure anything. I don’t know what our deal is but it’s how we like it. With that said, I’ll try my best to share with you how we made our cute little sign!
What You’ll Need:
A long piece of wood for a post (we used a stud)
Two foot long wood planks (we had one long piece that we cut into several)
*Plywood planks that are two feet in length to cover the first wood planks (we cut one large rectangular piece into multiples)
*Hooks to attach your interchangeable designs
Paint
Chalkboard paint/stickers
*Optional if you want to make your sign changeable as we did

Here’s What We Did:
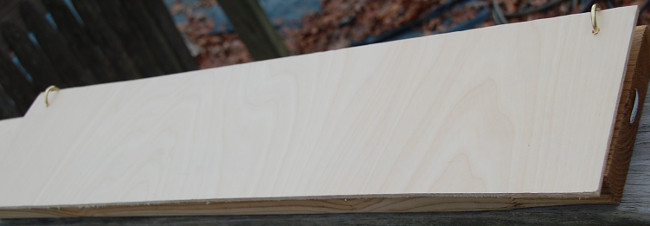
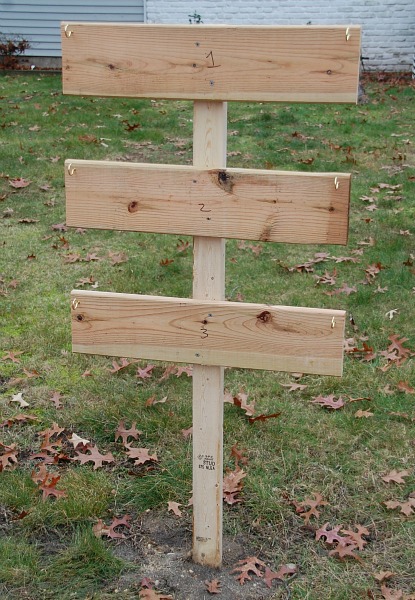
1. Cut each piece of wood to our desired length and/or width. He cut the post as tall as we would want it displayed in our yard, then we cut each piece of wood to fit nicely on it.
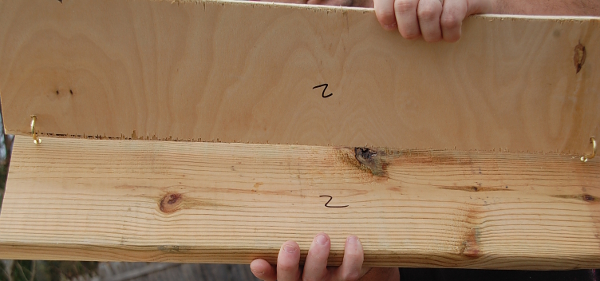
2. My husband labeled each plank on the back so that I would know which matched up well with the next. It helped me to be more organized with it, anyway. Pieces labeled 1 were the “It’s a…” at the top, pieces labeled 2 were the name pieces in the middle, and piece 3 was the stats board, which isn’t interchangeable.
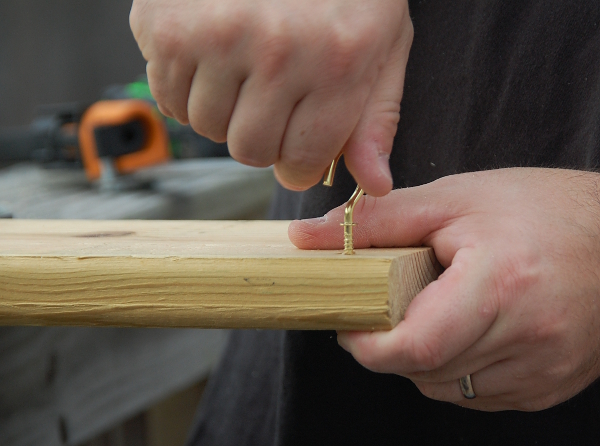
3. He drilled a pilot hole in the top two corners of both heavy wood planks and then hand-screwed the hooks onto each side.
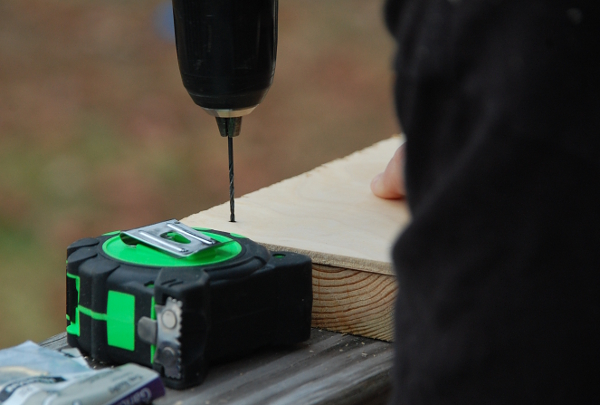
4. Then, he drilled a hole into each plywood plank to line up with the hooks so that they could hang off of the hooks.
5. Now that all of the pieces fit each other perfectly, I could paint!
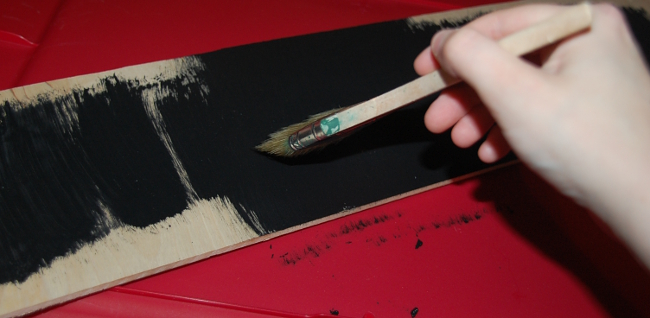
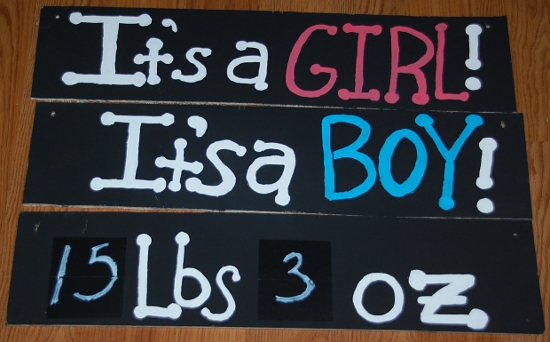
6. I painted each thin plank black with acrylic craft paint.
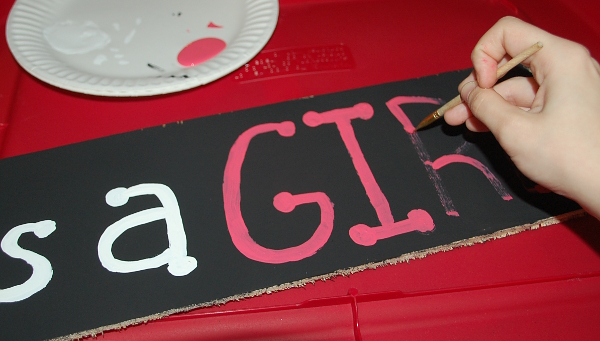
“It’s a Girl!” and “It’s a Boy” pieces, a piece for the girl name and one for the boy name, and then I wrote “lbs” and “oz” on the last board.
7. Because you have to fill in the stats, I thought chalkboard paint would be perfect for the last plank. Unfortunately, I’m all out of black chalkboard paint so I had the idea to use black chalkboard stickers over top of the painted background, in the areas where I would write the numbers. So now, it is [sticker] lbs [sticker] oz.
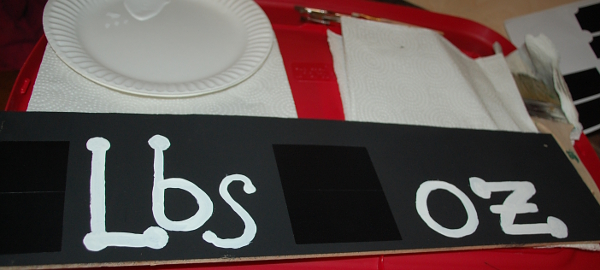
8. My husband or midwives can write up the baby’s pounds and ounces using chalk or chalkboard markers!
Perfect! Now each appropriate board just has to be hooked onto the post when the time comes!
UPDATE to add the completed sign after the birth of our baby:
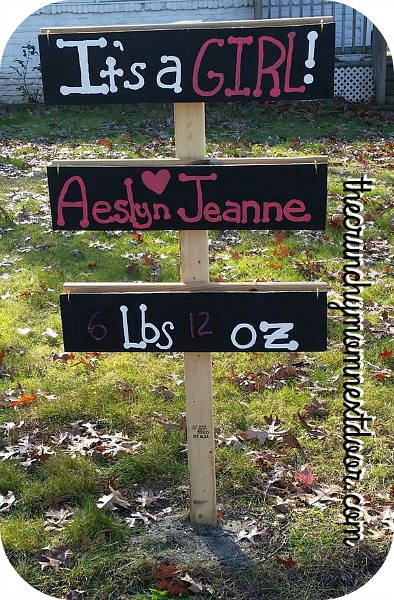
I still love this sign! I would have made this if we weren’t having a winter baby, I expected snow and ice on the ground already. It is such an easy switch to use for future children or for team green mommas!
Oh this is so super cute!! I love that it could be used for future babies as well!! So fun!! Yay to hubby for getting the wood supplies cut and ready lol!! I am a bad craft fininsher too 😉
This is so simple to make and fun. I really like that it would stand out in a yard. I will have to remember this if I have anymore Grandchildren.
I should have my son make one of these for his baby due in February.
I love the sign and if I were still having children I would definitely make one. Instead of that I might just make one for becoming a grandparent!