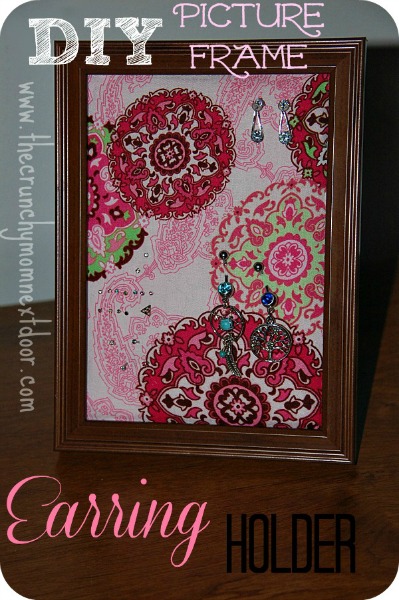
In the past, I’ve kept my jewelry in the small bags and boxes that it came in. As you can imagine, that wasn’t very attractive or organized, although I never lost it. I had up to eight piercings at once so I had a lot of body jewelry and earrings to keep track of. I haven’t worn earrings in so long but I am trying to gradually grow my jewelry collection and in doing so, I decided to make somewhere cute to keep it all. I’d heard about somehow using a picture frame as a jewelry holder so I wanted to try it out myself!
Picture frames come to me and I’m really not even sure how. I know that my mom has given me some but others have just appeared in my collection. When sifting through my things one day, I found a picture frame that I knew would make the perfect earring holder. I have lifetimes worth of fabric but I automatically knew which scrap I had that would go perfectly with the frame. Then I knew that since I’d be putting pressure inward when I push earrings through, I should try to fluff up the inside a bit so that it wouldn’t just give way. At that point, I actually grabbed my pillow and cut it open to use the fluff from inside. I was already complaining the night before that my pillow was flat and I needed a new one, so I just sped up the process… you know you have a craft addiction problem when you’re slicing open your pillow for a project!
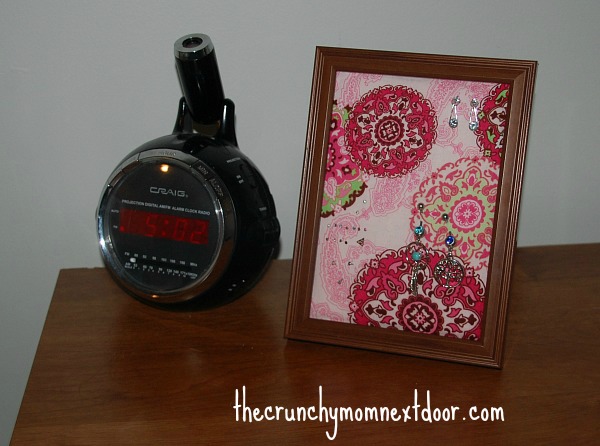
I called it an earring holder but I have my nose studs, navel jewelry, and earrings all stuck into it. You can put any of your pointy jewelry in there and if you wanted to add metal stud screws around the edges, you could probably hang necklaces on it also.
Alright, so here’s what you’ll need:
Picture frame
Hot glue gun
Fabric that will fit the frame
Fluff

Directions:
1. Cut your fabric to size. I draped mine over the glass that belongs in the picture frame and just cut around the edges. It doesn’t have to be perfect, it will get tucked in.
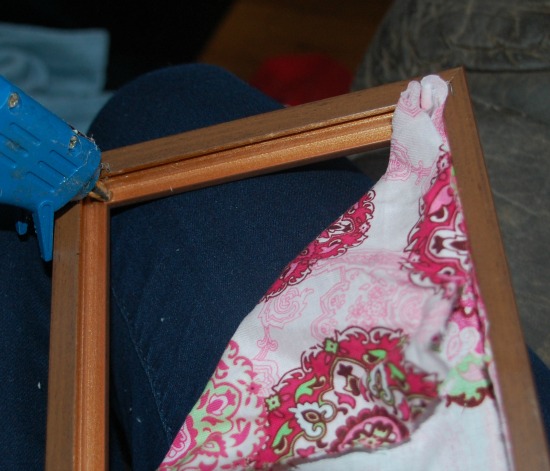
2. Hot glue along one inside edge of the frame and hold it down tightly.
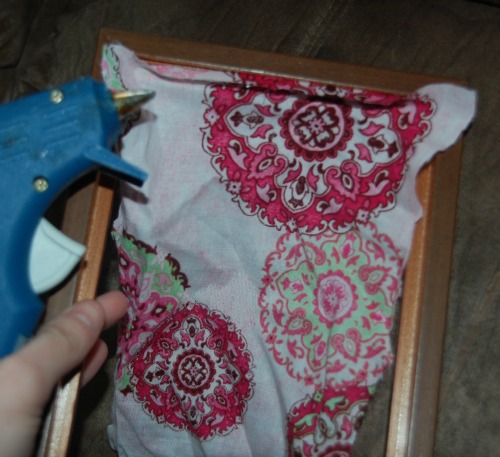
3. Be sure that the fabric is taut and glue each side one at a time, holding tightly and pressing down so that the glue is sure to hold.
4. Once every side of the frame is adhered to the fabric and dry, use something fluffy to create a pillow effect. You don’t want it to be too fluffy that you can’t close the frame, so you may have to remove layers of your fluff until it’s perfect.
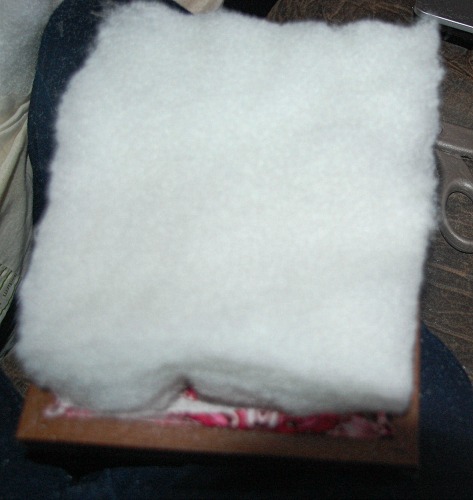
5. Put the back of the picture frame back onto the frame, over top of the fluff. This may take some finagling but just be careful and firm with it. If it’s too fluffy, just keep removing layers. It took me a few minutes and a lot of pushing and pulling but I got it.
6. Now you can stand it up anywhere you want, or hang it even. I put mine right next to my clock on my nightstand dresser.
Now, I wonder what I can do with the clear glass that’s leftover from the picture frame! Any suggestions?!
Wow, this came out really gorgeous!! Pinning too 🙂
What a super clever (and easy) DIY!! Love this!
I love these types of DIY projects. I did something like this and like how I was able to customize it with fabric options.
This is really cute..I’d love to make this!
Very cute! Love this idea.
Great job, it looks really nice. And it holds a lot of jewelry!
Super cute!! Although I would need a JUMBO one to hold all my earrings 🙂 I have something similar but I made mine with like a window screen material.. sounds wierd but it works! 🙂
This is a great idea. It is attractive too.
WOW! This is beautiful and oh so easy looking thanks!
you’re so creative! My sister has been making all of her christmas/birthday presents for the family this year, and it’s inspired me to do the same!!! I might even make this for her, she loves earrings.
What a great idea! I wear a lot of earrings, and also wondered about creating a more solid surface to support them. Your pillow fluff is a great problem solver!
This is such a cute idea! I might have to try it soon!